So you’re craving something juicy, cheesy, and satisfying—but you’re also too lazy to deal with the whole burger patty + bun drama? Yeah, I feel you. Enter: Grilled Cheeseburger Wraps—the low-effort, high-reward cousin of the traditional burger. It’s got all the good stuff (meat, cheese, flavor) without the bad stuff (crumbly buns, dripping sauces, and the eternal struggle of fitting the burger in your mouth without unhinging your jaw). Think of it as a cheeseburger that went to college, got organized, and learned how to wrap itself up neatly.
Why This Recipe is Awesome?
- It’s basically foolproof. Even if you’re a “boil water and burn toast” type of cook, you can pull this off.
- It’s portable—eat it on the couch, at your desk, or standing at the fridge at midnight. I’m not judging.
- Less mess than a burger but still just as satisfying. Your shirt will thank you.
- Perfect for picky eaters because you can load (or not load) it with whatever toppings you want.
- Great for meal prep… if you can resist eating them all right away.
Ingredients
- 1 lb ground beef (80/20 for flavor, or lean if you’re feeling healthy-ish)
- Salt & pepper (don’t be shy; meat likes seasoning)
- 1 tsp garlic powder (optional, but honestly, garlic makes everything better)
- 4–6 large flour tortillas (burrito size; this is not the time to use those tiny taco ones unless you enjoy frustration)
- 1 cup shredded cheddar cheese (or your favorite melt-y cheese—no judgment if you go heavy-handed)
- 1/2 cup diced onions (optional, unless you like crying—both from cutting and from flavor joy)
- Pickles (because what’s a cheeseburger without them?)
- Ketchup & mustard (or whatever sauce makes you happy—spicy mayo? BBQ? Go wild.)
- Lettuce & tomato slices (optional, but adds that “I’m eating something fresh” illusion)
- Butter or cooking spray (for grilling the wraps)
Step-by-Step Instructions
- Cook the beef. Throw that ground beef in a skillet over medium-high heat. Break it up with a spatula. Add salt, pepper, and garlic powder. Cook until browned and no longer pink—about 5–7 minutes. Drain the excess grease unless you want a greasy slip-n-slide inside your wrap.
- Warm the tortillas. You can zap them in the microwave for 10–15 seconds or toss them in a dry skillet for a few seconds. Warm tortillas = easier folding.
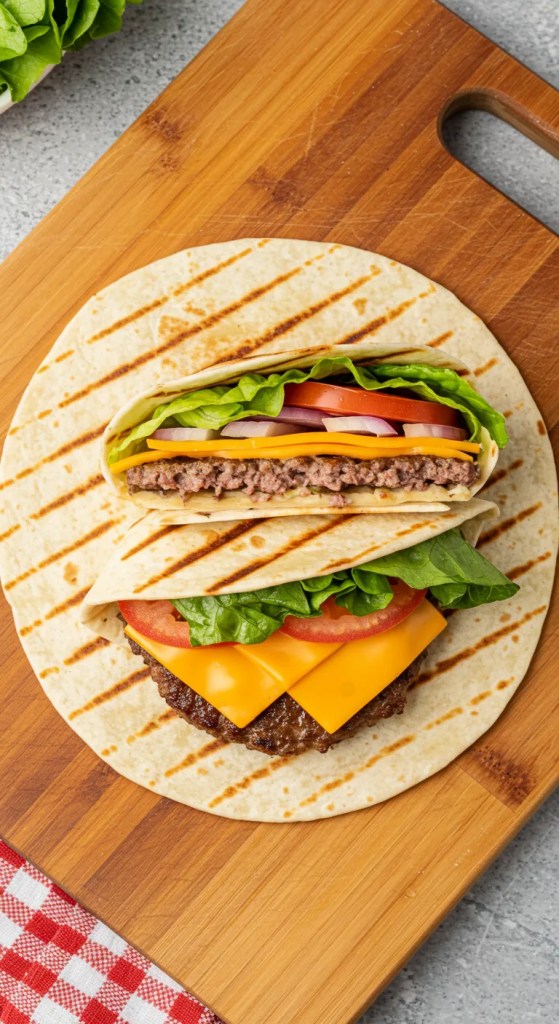
- Assemble your masterpiece. Lay out a tortilla. Spread a thin layer of ketchup and mustard (or whatever sauce you’re into). Sprinkle some cheese in the middle. Add a scoop of beef, then your onions, pickles, lettuce, and tomato. Top with more cheese because… why not?
- Wrap it up. Fold in the sides, then roll it up from the bottom like a burrito. Make it tight, but don’t overstuff unless you want a cheeseburger explosion mid-bite.
- Grill it. Heat a skillet over medium heat with a little butter or cooking spray. Place the wrap seam-side down and grill until golden brown—about 2–3 minutes per side. This step melts the cheese and gives you that crispy, toasty goodness.
- Serve and devour. Slice in half if you want to pretend you’re being civilized. Or just eat it whole.
Common Mistakes to Avoid
- Overstuffing the tortilla. It’s tempting, I know. But if you overfill, you’ll end up with a sloppy mess and a tortilla that rips like cheap paper.
- Skipping the grill step. Sure, you could eat it as-is… but why rob yourself of that golden crispy exterior?
- Using cold tortillas. Cold tortillas are stiff and rebellious—they won’t roll without cracking.
- Forgetting to season the beef. Bland meat = sad wrap. Season early and often.
- Going too heavy on watery veggies. Tomatoes and lettuce are great, but too much will make your wrap soggy faster than you can say “Why is my lunch leaking?”
Alternatives & Substitutions
- Meat: Swap ground beef for ground turkey, chicken, or even plant-based crumbles if you’re vegetarian.
- Cheese: Not into cheddar? Try mozzarella for a pizza-burger vibe, pepper jack for a spicy kick, or American cheese for classic diner nostalgia.
- Sauce: Skip ketchup/mustard and go with sriracha mayo, ranch, or chipotle sauce for a twist.
- Tortillas: Whole wheat for “health,” spinach wraps for color, or low-carb tortillas if you’re into that sort of thing.
- Toppings: Bacon, sautéed mushrooms, jalapeños… basically whatever makes your taste buds happy.
FAQs
Q: Can I make these ahead of time?
Yes, but grill them fresh for best texture. If prepping ahead, assemble and store in the fridge, then grill before serving.
Q: Do I have to use a skillet?
Nope. A panini press or grill pan works great too. Just don’t microwave it unless you like sad, soggy wraps.
Q: Can I freeze them?
You can, but they’re best fresh. If freezing, wrap tightly in foil, then reheat in a skillet (not the microwave) for crispiness.
Q: How do I keep them from falling apart?
Don’t overfill, use warm tortillas, and fold tightly. Also, grill seam-side down first—it seals the deal.
Q: Can I make them “healthier”?
Sure. Use lean meat, whole wheat tortillas, and go light on cheese. But honestly… it’s a cheeseburger wrap. Just enjoy it.
Q: What if I don’t like pickles?
Leave them out! Or replace with jalapeños for a spicy punch.
Q: Can I make these in the oven?
Yep. Wrap in foil and bake at 375°F for about 10–15 minutes, then unwrap and broil for a minute to crisp.
Related Recipe:
- Crispy Crab Rangoon Recipe | Easy Appetizer
- Southern Deviled Eggs: The Ultimate Classic Recipe
- 5 Healthy Breakfast Ideas with Eggs, Avocado, and Strawberries
Final Thoughts
And there you have it—Grilled Cheeseburger Wraps that are easy, tasty, and just messy enough to be fun. They’re perfect for busy weeknights, lazy weekends, or those “I need something awesome in my mouth in 10 minutes” emergencies.

