So you’re staring at an empty snack drawer, dreaming of gooey marshmallows and chocolate that hits like a hug from your childhood bestie, but the thought of actual camping? Hard pass. Enter s’mores crack bars: the lazy genius’s answer to instant bliss. Whip these up in under an hour, and boom—your kitchen smells like a bonfire party, minus the bug spray. Ready to get your sweet tooth buzzing?
Why This Recipe is Awesome
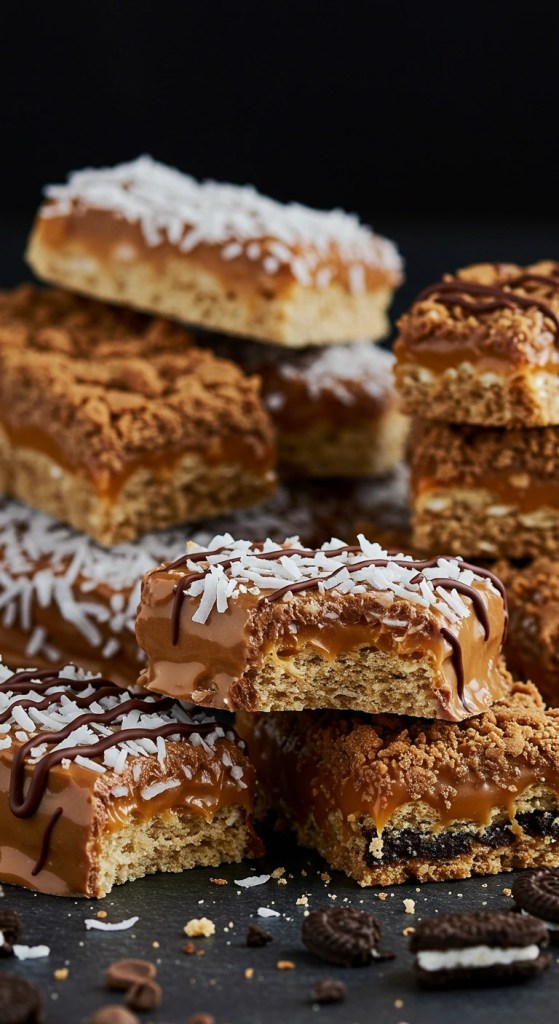
Look, life’s too short for fussy desserts that require a PhD in piping bags. These s’mores crack bars are straight-up addictive—think graham cracker base, melty chocolate, toasted marshmallows, and a buttery toffee drizzle that cracks under your fork like it knows you’re the boss. They’re idiot-proof, even I didn’t mess it up (and trust me, I’ve burned water).
Perfect for game nights, rainy afternoons, or when you just need to adult less and indulge more. One bite, and you’ll feel like a campfire wizard who skipped the smoke. Plus, they store like champs—hello, midnight fridge raids. What’s not to love? (Okay, fine, the temptation to eat the whole pan solo.)
Ingredients You’ll Need
Grab these bad boys from your pantry or a quick store run. We’re keeping it simple—no exotic imports here, unless you count mini marshmallows as “fancy.”
- 1 sleeve graham crackers (about 9 full sheets, crushed into bite-sized chunks—don’t pulverize them to dust, you barbarian)
- 1 cup semi-sweet chocolate chips (the good melting kind; milk chocolate works if you’re feeling nostalgic)
- 3 cups mini marshmallows (the fluffier, the better—regular ones? Meh, but they’ll do in a pinch)
- 1/2 cup unsalted butter (salted’s fine if you’re living dangerously)
- 1 cup light brown sugar (packed tight, like your weekend plans)
- 2 tablespoons heavy cream (for that silky toffee vibe—milk’s a sad substitute)
- 1/2 teaspoon vanilla extract (pure, please; imitation tastes like regret)
- Pinch of sea salt (optional, but it makes the sweet pop like fireworks)
Yields about 16 bars. Pro tip: Double the batch if sharing’s involved. (Spoiler: It won’t be.)
Step-by-Step Instructions
Alright, chef—tie that apron like it’s a cape. This is no-sweat territory. Preheat your oven to 350°F (175°C) and line an 8×8-inch baking dish with parchment paper. Butter or spray it lightly so nothing sticks like a bad date.
- Scatter the base. Dump your crushed graham crackers evenly into the prepared dish. Press them down gently with a spatula—firm but not crushed, like giving a high-five. This is your sturdy foundation, folks.
- Layer on the chocolate. Sprinkle the chocolate chips over the grahams like confetti at a party. Pop the dish in the oven for 5 minutes—just enough to soften those chips without turning them into a puddle. Pull it out and spread the melty goodness with the back of a spoon. Smooth, not sloppy.
- Marshmallow madness. Shower the top with 2 cups of those mini marshmallows. They should blanket everything like fresh snow on a cheat day. Back into the oven for another 5-7 minutes, until they’re golden and gooey. Watch ’em like a hawk—burnt mallows taste like charred dreams.
- Make the crackly drizzle. While that’s toasting, grab a saucepan. Melt the butter over medium heat, then whisk in the brown sugar and heavy cream. Stir like you’re gossiping—constantly—for 3-4 minutes until it thickens into a glossy toffee sauce. Off the heat, stir in vanilla and that pinch of salt for zing.
- Drizzle and chill. Pull the bars from the oven and let ’em cool for 5 minutes (patience, grasshopper). Then, pour the warm toffee over the marshmallows in zigzags—artistic or chaotic, your call. Top with the remaining 1 cup marshmallows for extra fluff. Let it all set in the fridge for 30 minutes until firm.
- Slice and devour. Lift out using the parchment, cut into squares with a sharp knife (warm it under hot water for clean edges), and serve. Pair with milk or coffee—because nothing says “I nailed this” like a victory sip.
There you have it—s’mores crack bars that taste like summer in a square. Total time? Under an hour. You’re welcome.
Common Mistakes to Avoid
Nobody’s perfect, but let’s dodge these pitfalls so your bars don’t end up in the “what was I thinking?” pile. I’ve been there, so learn from my kitchen crimes.
- Over-crushing the grahams. You want chunks for texture, not sand for a beach fail. Rookie move—keeps things chewy, not crumbly.
- Skipping the oven melt for chocolate. Throwing it on cold? It stays rocky. That quick bake turns it silky—trust me, your teeth will thank you.
- Eyes off the marshmallows. They go from puffy perfection to blackened hockey pucks in seconds. Set a timer, or risk a smoke alarm serenade.
- Impatient fridge time. Cutting too soon? Gooey mess alert. Give it the full 30—it’s like waiting for dough to rise, but way more rewarding.
- Forgetting the parchment. Stuck bars = scraped pan drama. Line it up front, save your sanity.
See? Easy fixes. Now you’re basically a pro.
Alternatives & Substitutions
Not everyone’s pantry is a candy store, and hey, variety’s the spice of snacking. Tweak these s’mores crack bars to fit your vibe—I’ll throw in my two cents for good measure.
- Gluten-free? Swap regular grahams for gluten-free ones (brands like Schar nail it). Tastes the same, zero guilt—IMO, even better for that crisp snap.
- Vegan twist: Use dairy-free chocolate chips, coconut oil instead of butter, and aquafaba-whipped “marshmallows” (or Dandies brand). It’s surprisingly spot-on; I tried it at a potluck and fooled the carnivores.
- Nutty upgrade: Toss in chopped pecans or almonds over the chocolate layer. Adds crunch like a surprise party—my fave for when plain feels too vanilla.
- Dark chocolate swap: Ditch semi-sweet for 70% dark chips if you’re feeling fancy. Balances the sweet with a sophisticated edge—perfect for impressing that one friend who “doesn’t do sugar.”
- Less sugar? Cut brown sugar to 3/4 cup and add a splash more cream. Still crackly, but your dentist might high-five you.
Keep it simple—these subs won’t derail the magic. Experiment, but don’t go wild; we’re not reinventing the wheel here.
FAQs
Can I make these ahead of time?
Heck yeah—assemble and chill up to 2 days early. They’ll stay gooey in the fridge, but let ’em warm to room temp before slicing. Pro move for surprise guests.
Why are they called “crack” bars?
Because that toffee topping cracks like brittle under your bite, and oh boy, they’re habit-forming. One square leads to “just one more”—hence the nickname. Addictive? Guilty as charged.
Can I bake them in a bigger pan?
Sure, but scale up ingredients for a 9×13. Thinner bars mean less bake time—check at 3 minutes for the chocolate melt. Otherwise, you’ll end up with s’mores crisps, not slabs.
What if I don’t have heavy cream?
Milk or half-and-half works in a pinch, but it’ll be less thick. Stir extra vigorously—think of it as a workout for your whisk arm. Results? Still delish, just not as luxe.
Are these kid-friendly?
Totally—my niece calls them “cloud candy.” Just supervise the oven part; hot marshmallows are no joke. Bonus: They’ll think you’re a dessert superhero.
Can I add peanut butter?
Oh, twist my arm—stir 1/4 cup PB into the toffee sauce. Reese’s vibes incoming. It’s my secret weapon for chocolate lovers who need that salty kick.
How do I store leftovers?
Air-tight container in the fridge for up to a week (if they last that long). Freeze slices for a month—thaw and microwave 10 seconds for fresh-baked feels. Easy peasy.
Final Thoughts
Whew, you’ve got the blueprint for s’mores crack bars that’ll have you grinning like you just won the dessert lottery. It’s all about that effortless joy—quick, messy in the best way, and zero judgment if you polish off half the pan solo. Now go fire up that oven, crank some tunes, and treat yourself like the culinary rockstar you are. What’s your first batch twist gonna be? Hit me up if you tweak it—happy baking, buddy!

